Set window visibility Action(Power Automate Desktop)
This action changes the show/hide status of the specified window.
How to use
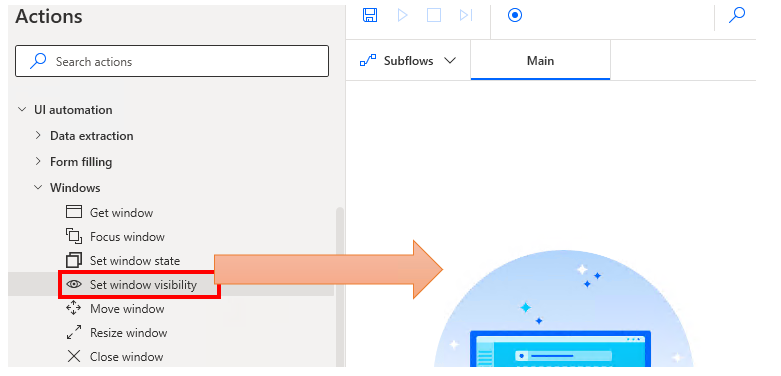
From "Actions", "UI Automation", "Windows", Drag "Set window visibility".
Set parameters.
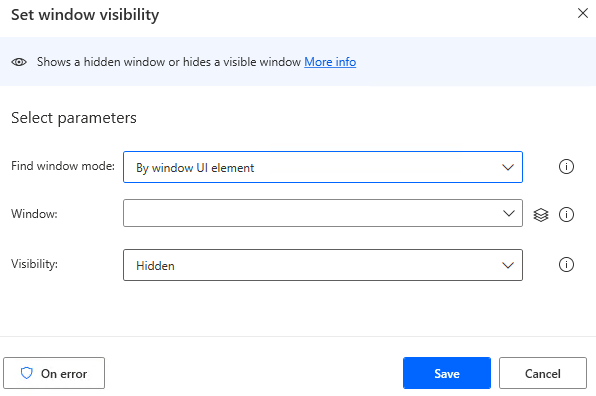
Parameter
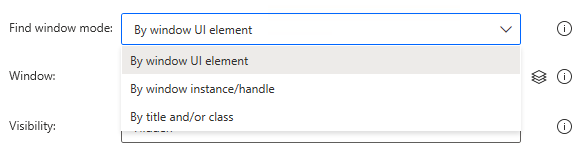
Find window mode
Select how you want to specify the window.
- By window UI element
- By window instance/handle
- Per title and/or class
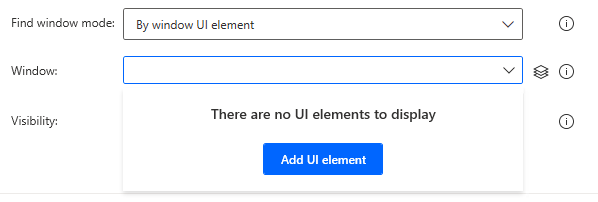
By window UI element
Directly specifies the UI element of the window.

The following pops up when you click on the input field.
If you have already registered a UI element, select the object,If not registered, click the "Add UI element" button.
Hover the mouse over the menu item you wish to select when the next window appears.

When you hover the mouse over it, it will be surrounded by a red frame.
Then hold down the Ctrl key and click.
The input field should appear as shown in the following figure (the text will vary depending on the UI element you have selected).

By window instance/handle
Specifies the window instance created by the "Get window" action.

Per title and/or class
Specify the title and class.
It can be found in the selector of the UI element, but due to its difficulty, other options are recommended whenever possible.

Visibility
Select to "Visible" or "Hideen".

For those who want to learn Power Automate Desktop effectively
The information on this site is now available in an easy-to-read e-book format.
Or Kindle Unlimited (unlimited reading).

You willl discover how to about basic operations.
By the end of this book, you will be equipped with the knowledge you need to use Power Automate Desktop to streamline your workflow.